I Made Rosemary Water for My Hair: What Worked, What Didn’t, and the Exact Recipe

You know what? I didn’t plan to be the “rosemary water person.” My scalp got itchy last winter, and my hair looked dull. My aunt kept saying, “Use romero.” I shrugged. Then I tried it. And I kept trying it. Here’s my real take, with the simple recipe I use now and what happened week by week.
(For a more detailed, step-by-step version of this experiment, you can check out my full guide here: I Made Rosemary Water for My Hair: What Worked, What Didn’t, and the Exact Recipe.)
For an evidence-based rundown of how rosemary water can help calm itchiness, reduce excess oil, and even support healthy growth, read this concise overview of its benefits here.

Why I Tried It (and My Hair Type)

  • Hair type: wavy 2B/2C, fine strands, oily scalp, dry ends
  • Color treated? Yes, toning every few months
  • Routine before: wash 3x a week, light leave-in, heat once a week

My goals were small: less itch, less oil, a bit more shine. Growth would be nice, but I didn’t chase it.

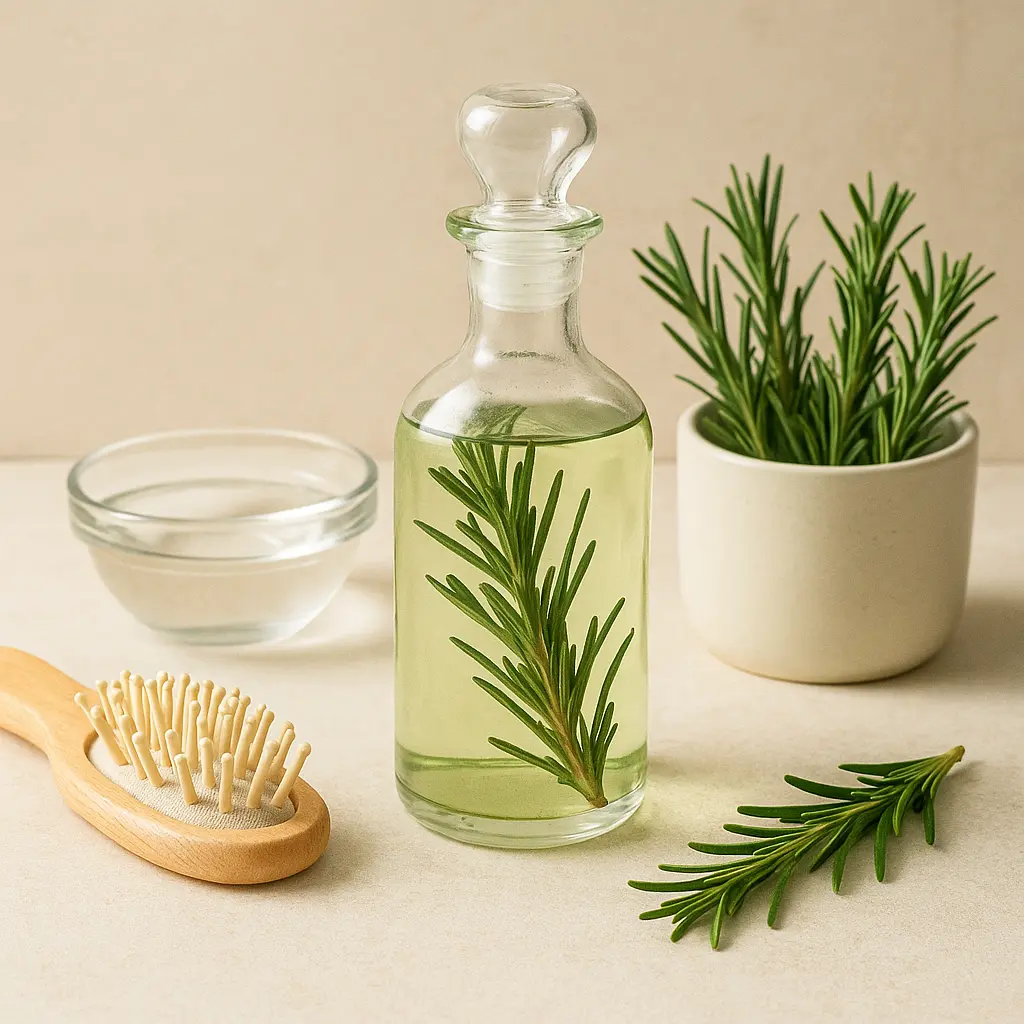
What I Used in My Kitchen

  • Fresh rosemary: 3 to 4 sprigs (hand-length)
    or dried rosemary: 2 tablespoons
  • Water: 2 cups (I used filtered water from my Brita)
  • A small pot and a strainer
  • A glass jar with lid (I used a clean 16 oz mason jar)
  • Spray bottle (helpful, not required)

That’s it. No fancy gear. The smell is piney and clean, a little like a cold walk in the woods.

Two Easy Ways I Make It

I tested both. My scalp liked Method 1 more. My friend with very dry hair liked Method 2.

Method 1: Gentle Simmer (My Go-To)

  1. Rinse the rosemary.
  2. Add rosemary and 2 cups water to a pot.
  3. Bring to a low simmer. Keep it gentle.
  4. Let it simmer 15 minutes. Turn off heat.
  5. Cover and steep 30 minutes.
  6. Strain. Cool. Pour into a jar or spray bottle.

Color looks like light tea. Fridge life: up to 7 days.

Method 2: Cold Steep (Softer Scent, Lighter Feel)

  1. Put rosemary in a jar.
  2. Pour in 2 cups cool water.
  3. Cover and chill 12 to 18 hours.
  4. Strain.

This one is mild and smells less strong.
If you want another visual, step-by-step walkthrough of brewing and using rosemary water, you can find a handy DIY guide here.

Quick note: Don’t add essential oil straight to your scalp water. It needs a carrier, and it can burn. I learned the hard way on my neck. Red patch. Not cute.

How I Use Rosemary Water

  • Wash hair like normal.
  • After conditioner, I rinse it out.
  • Then I pour or spray rosemary water on my scalp and lengths.
  • I let it sit 3 to 5 minutes.
  • I either do a quick rinse with cool water or leave it in. On work days, I leave it in.
  • I use it 2 to 3 times a week.

I also used it on non-wash days: a few sprays on my roots when they felt greasy. It gave a fresh feel without that sticky dry shampoo vibe.

What Happened: My Week-by-Week Notes

  • Week 1: Scalp itch calmed after the second use. The smell felt soothing. My husband said I smelled like a nice garden. I’ll take it.
  • Week 2: Less oil at the roots by day 2. My waves clumped better. I saw a bit more shine.
  • Week 3: Noticeably less hair in the shower drain. Not zero, but less. I didn’t change my shampoo.
  • Week 4: My crown felt fuller on day 2 after wash. Tiny “baby hairs” started to stand up along my hairline. Could be new growth or just healthier roots. Either way, I smiled.
  • Week 6: Itch is rare now. My ends look less ragged. I still trim, but I stretch a trim by two weeks.
  • Week 8: Routine feels easy. I stick with the simmer method. Cold method is fine, but my scalp loves the warm one more.

To be fair, I also cut heat to once every two weeks. So yes, that helps too. I like honesty.

The Good, The Meh, and The Oops

  • The good: Calmer scalp, a clean root feel, softer waves, light shine. Cheap and fast.
  • The meh: The smell can linger a bit. I like it; my kid said I smelled like focaccia. Not wrong.
  • The oops: I left a jar in the fridge for 12 days. It got cloudy. Toss it by day 7.

Tips That Actually Helped

  • Use fresh rosemary if you can. It smells brighter. Dried works fine though.
  • Keep it in glass. The scent sticks less than in plastic.
  • Patch test first. Dab on your inner arm or behind your ear. Wait a day.
  • If your hair is very dry, try the cold method and rinse it out.
  • If your scalp is very oily, leave some in at the roots. It feels crisp and clean.
  • Add-ins I tried:
    • A few mint leaves (nice tingle, not harsh)
    • 1 teaspoon of apple cider vinegar per cup (extra soft, but do this once a week, not more)
  • Don’t boil it hard. A rolling boil made mine smell sharp and bitter.
  • Bonus tip: shopping for fresh herbs is even more fun with company—if you’re in Strasbourg and want to turn your market run into a relaxed meet-up, you can set one up through Plan Cul Strasbourg. The page walks you through easy ways to connect with like-minded locals and highlights laid-back spots near the city’s best produce stalls where you can chat over coffee before picking up your rosemary.
  • Out in Wyoming? If you’re swinging by the Downtown Laramie farmers’ market, you can pair your herb haul with a bit of flirting by skimming this quick Laramie hookups guide—it pinpoints relaxed venues and simple ice-breaker ideas, making it easy to meet fun locals while you stock up on fresh rosemary.

Quick Troubleshooting

  • Itchy or red skin? Stop. Rinse with cool water. Try the cold method or use it only on lengths next time.
  • Hair feels stiff? You used too much or left it in too long. Rinse lightly.
  • No change after 4 weeks? Try 3x a week, and check your shampoo too. Gentle cleansers play nice with this.

Storage: Keep It Safe

I stick a tiny date label on the jar lid—whipped up in seconds with CoverMaker—so I always know when it’s time to brew a fresh batch.

  • Keep in the fridge.
  • Use within 7 days.
  • If it smells off or looks slimy, toss it.

Who Should Skip It

  • If you’re pregnant or nursing, ask your doctor first.
  • If you have a rosemary allergy or very sensitive skin, don’t use it.
  • Kids’ scalps can be sensitive. I skip it on my little one.

Final Take: Will I Keep Using It?

Yep. It’s simple, cheap, and it helped my scalp most of all. My waves look a bit shinier, and I shed a little less in the shower. Is it magic? No. But it’s a calm, steady helper. Like a friend who brings soup.

If you want my exact recipe, here it is one more time, short and sweet:

  • 3 to 4 fresh sprigs or 2 tablespoons dried rosemary
  • 2 cups water
  • Simmer 15 minutes, steep 30, strain, cool, fridge 7 days
  • Use 2 to 3 times a week as a final rinse or scalp spray

I’ll keep a jar on the top fridge shelf. It sits next to my oat milk and makes me feel a little put together. Funny how that works.

I Tried Making My Own Essential Oils. Here’s What Actually Worked.

I make a lot of my own stuff at home. Bread, candles, jam. One summer, I added essential oils. I thought it would be fast and easy. It wasn’t. But you know what? It smells dreamy, and I learned a lot. Let me explain.

If you prefer a detailed, start-to-finish walkthrough complete with photos and troubleshooting notes, you can read my step-by-step breakdown right here.

What I Used (and Why I Swapped Gear Midway)

I tried three setups. I used them. I cleaned them. I messed up with them. Here’s the real deal.

  • Copper alembic still, 2 liter, from The Essential Oil Company. Pretty. Sturdy. Copper helps with funky smells. I sealed the lid with flour paste. It felt like making pie crust on a kettle. Cost me a bit more, but it ran smooth.
  • Vevor stainless steel essential oil distiller, 5 liter. Bigger batch size. Easier to clean. The silicone gasket smelled odd the first run. I steamed it with plain water twice, and the smell faded.
  • Stock pot “kitchen hack” with a bowl and ice. It works. But the yield is tiny. Good for a demo. Not great if you want a bottle.

I also used a cheap hot plate for the garage, mason jars, a 250 ml glass separatory funnel (the little glass thing that lets oil float and drip out), and 5 ml amber bottles. Simple tools help. Big note: I don’t leave heat alone, ever.

Plants I Tried (From Yard to Jar)

I went with stuff I could grow or buy in bulk.

  • Lavender (English, from my yard)
  • Peppermint (store bunches and my patio pot)
  • Rosemary (backyard bush that never quits)
  • Orange peel (from a bag of oranges; kids ate the fruit)

I used fresh plants most of the time. Fresh smells bright. Dried can work too. The main thing? Pack the pot full but not tight. You need space for steam.

How Steam Distillation Feels in Real Life

Here’s the thing. The method is simple, but the patience is hard.

  1. I fill the bottom pot with water.
  2. I add plant matter to the upper chamber (or the pot, if it’s a simple still).
  3. I heat. Steam rises. It grabs the oil.
  4. The steam hits a cool coil and turns into liquid.
  5. The liquid drips into a jar. Oil floats on top. Water sits below. That water is called hydrosol. It’s gentle and nice for skin.

If you want to dive deeper into the science and exact step-by-step process, this detailed guide on how to make essential oils using steam distillation breaks everything down beautifully.

Then I use the separatory funnel. Oil on top, hydrosol below. Drain the water slow. Keep the oil. It feels like magic. Slow magic.

My Real Runs: What I Got and What I Messed Up

Lavender, mid-July

  • Input: one big paper grocery bag of fresh flowers and tender stems (about 700 g).
  • Time: 2 hours on low heat. Tiny simmer, not a boil.
  • Result: about 4 ml lavender oil and around 600 ml hydrosol.
  • Notes: First time, I ran it too hot. It smelled sharp and cooked. Second time, I went slow, like a lazy Sunday. Much better. My neighbor asked if I baked cookies. Nope. Just plants.

Peppermint, early fall

  • Input: two thick bundles (around 300 g fresh leaves).
  • Time: 90 minutes.
  • Result: about 1 ml oil and a lot of mint hydrosol.
  • Notes: The oil is strong. I use one drop in a bowl of Epsom salts for a bath. That’s enough. Too much makes my skin tingle in a weird way.

Rosemary, late spring

  • Input: the top 8 inches of fresh stems (around 400 g).
  • Time: 2 hours.
  • Result: about 2 ml oil. Hydrosol was amazing for cleaning spray.
  • Notes: Copper felt best here. It cut a faint “green” bite I got with stainless.

If your goal is to make a straightforward rosemary water rinse for hair instead of distilling a concentrated oil, I recorded exactly what worked (and what flopped) in this recipe.

Orange peel, winter

  • Method 1: steam distill fresh peel. I zested 8 oranges.
  • Result: tiny bit of oil. Smelled sweet but light.
  • Method 2: hand-pressed peel with a spoon and cheesecloth over a bowl.
  • Result: more oil, faster, but sticky and messy.
  • Notes: Citrus oil can be sun-sensitizing on skin. I use it for room scent or with gloves when cleaning.

Kitchen hack tryout

  • Stock pot + small bowl + flipped lid with ice on top.
  • Result: a few drops, that’s it. But for kids’ science day? Huge hit. The “rain cloud” trick gets them every time.

What I Loved (And What Bugged Me)

Good stuff

  • The smell fills the house. It’s like stepping into a garden shop that knows your name.
  • Hydrosol is a hidden gem. It’s soft, and my skin likes it. I spray it on my pillow at night.
  • Copper still looks like art. It made me want to keep it on the counter.

Not-so-good stuff

  • Yield is small. A bag of lavender for a teaspoon of oil? Yep.
  • Time. You babysit the heat. Snacks help. Music too.
  • Cleaning. Citrus sticks to everything. Citric acid soak helps copper. For stainless, hot soapy water, then a rinse with vinegar, then water again.

Smell, Heat, and That Tricky Sweet Spot

The hard part is heat control. If the drip is wild, it’s too hot. If it barely drips, it’s too cold. I aim for a steady tap-tap drip. Like a slow faucet. When it smells scorched, I turn it down. When it smells like fresh plants, I smile. That’s the sweet spot.

Also, I learned to seal joints on the copper still with flour paste. Just a bit. It stops leaks. It feels silly but works.

Storage That Saved My Batches

I use amber glass bottles, 5 or 10 ml. I fill them to the neck so air doesn’t sit on top. I label the date and plant.
I whipped up simple waterproof labels with CoverMaker in five minutes, which kept my rosemary and lavender from playing name-swap in the cabinet.
I keep them in a cool cabinet. Oils last longer that way. Hydrosol goes in the fridge and stays fresh for a few months. If it smells “off,” I dump it. Sad, but safe.

Safety Stuff I Actually Follow

  • I don’t leave heat alone. Not even to fold laundry.
  • Oils don’t go straight on skin for me. I add one drop to a teaspoon of carrier oil first.
  • Citrus oil on skin + sun? Not for me. I wait a day.
  • Pets are sensitive. I keep oils away from my cat. He decides the rules here.

Swinging back to the fun side of things, once you have a stash of tiny bottles it's surprisingly social: friends, neighbors—even total strangers—will want to sniff and swap. If your immediate circle isn't as scent-obsessed as you are, you can always meet new locals who appreciate homemade goods through a community-minded site like FuckLocal. The platform matches you with people nearby who are open to trading, gifting, or simply chatting about handcrafted creations, so your next lavender batch might end up sparking a brand-new connection.

If you happen to live in Georgia and like the idea of turning a lavender-distilling session into a relaxed date night, browsing Macon hookups will connect you with nearby singles who list DIY hobbies in their profiles, making it easy to bond over steam-distillation tips and maybe discover some chemistry beyond the beaker.

What I’d Tell a Friend

Start small. Try peppermint or lavender. Plan for 1–4 ml of oil per run with a home still. That’s normal. Use the hydrosol every day. Room spray, linen mist, even mop water. It’s the quiet hero.

For more pointers and equipment tips before you fire up your first batch, this no-nonsense write-up—a beginner’s guide to distilling essential oils at home—is worth a skim.

If you want cute and classic, go copper. If you want easy scrub and bigger batches, go stainless. If you only want a few drops once a year, the kitchen hack will do. Just don’t expect a bottle.

A Tiny Ritual That Made It Fun

This sounds silly. I saved a little notebook just for scent notes. What day. What plant.

I Finally Nailed My At-Home Açaí Bowl (After a Few Purple Messes)

You know what? I used to pay 12 bucks for an açaí bowl at a café near my gym. It tasted like cold sunshine. Then I tried to make one at home. My first bowl was… soup. Purple soup. Still tasty, but not that spoon-stands-up texture I wanted.
If you want the full play-by-play of my early flops and final win, I wrote about it in this deep-dive.

I kept at it. Different blenders. Different packets. Toppings that smack and toppings that flop. Here’s my honest take on how I make an açaí bowl that hits, plus the gear and brands I’ve actually used.


What I Keep in My Kitchen

  • Açaí packets: Sambazon Original Blend (unsweetened) or Trader Joe’s Unsweetened Açaí Packets
  • Blender: Vitamix E310 at my place; my mom uses a Ninja Professional. I tried a NutriBullet too.
  • Frozen fruit: Costco (Kirkland) mixed berries, Dole mango, or a frozen banana
  • Liquid: Almond Breeze unsweetened almond milk or Califia Farms oat milk
  • Extras: Kirkland organic peanut butter, PB2, Bob’s Red Mill chia seeds, hemp hearts, unsweetened coconut flakes, Navitas cacao nibs, Purely Elizabeth vanilla granola, a little honey

Small note: a tamper makes life easier. No tamper? Use short pulses and scrape the sides a lot.


My Base Recipe (Café Thick, Spoon Test Approved)

Real example from last Saturday:

  • 2 açaí packets (100 g each), run under warm water 5 seconds to loosen
  • 1/2 frozen banana
  • 1/2 cup frozen blueberries
  • 1/4 cup frozen strawberries
  • 2–3 tablespoons almond milk (start small)
  • 1 teaspoon peanut butter (or almond butter)
  • 1 small squeeze of honey (optional)

Blend on low. Use the tamper. Add a splash more milk only if the blades stall. I stop as soon as it looks like soft-serve. Thick enough to hold toppings. Smooth, but not wet.

If I want it even creamier, I add 1/4 of a ripe avocado. You can’t taste it. It just makes the base rich.


Step-by-Step, Like I Actually Do It

  1. I cut the açaí packets in half and break the slabs into chunks.
  2. I toss in the frozen fruit.
  3. I add one tiny splash of milk. Like, a tablespoon.
  4. Blend low. Stop. Push down the sides. Blend again.
  5. If it won’t move, I add another tablespoon of milk. That’s it.
  6. When it swirls like soft-serve, I pour it into a cold bowl.

My early mistake was dumping in half a cup of milk. That makes smoothie soup. Learn from me.


Toppings That Never Fail Me

  • Purely Elizabeth vanilla granola (crunchy, not too sweet)
  • Sliced banana or strawberries
  • Chia seeds and hemp hearts for that tiny pop
  • Coconut flakes for texture
  • Cacao nibs when I want a chocolate snap
  • Peanut butter drizzle. Sometimes I warm it 10 seconds so it flows.
  • Bee pollen on fancy days

I don’t do all of these at once. Three or four is the sweet spot.


Three Bowls I Make on Repeat

  1. Peanut Butter Crunch
    Base: açaí + frozen banana + blueberries + spoon of peanut butter
    Top: banana slices, granola, peanut butter drizzle, cacao nibs

  2. Berry Glow
    Base: açaí + frozen strawberries + blueberries + splash of oat milk
    Top: strawberries, coconut flakes, honey

  3. Green-But-You-Won’t-Taste-It
    Base: açaí + frozen mango + handful of spinach + 1/4 avocado
    Top: granola, chia, a squeeze of lime over the top (trust me)

Season swap: In summer, I add peach slices on top. In fall, I sprinkle cinnamon and use pumpkin seeds. Little changes, big mood.


Blender Talk (The Good, The Bad, The Loud)

  • Vitamix E310: My main squeeze. The tamper helps. Thick bowls are easy. Loud, but fast.
  • Ninja Professional: My mom’s. It works, but I have to pulse and scrape more. Add liquid very slowly.
  • NutriBullet: It can do it. I use smaller batches and quick pulses. Let it rest if it overheats.

If your bowl is thin, it’s not always your fault. Some blenders just need less liquid and more patience.

Still hunting for the right machine? This best-blender roundup is a handy cheat sheet if you’re shopping around.


Mistakes I Made (And How I Fixed Them)

  • Too watery? Use less liquid. Start with 2 tablespoons. Use more frozen fruit.
  • Won’t blend? Cut the açaí into smaller chunks. Run packets under warm water for 5 seconds first.
  • Too sweet? Use unsweetened packets. Skip the honey. Watch the granola.
  • Bland? Add a pinch of salt. A tiny pinch wakes it up.
  • Weird texture? Stop blending early. Over-blending warms it and melts the base.

And please don’t push down with a spoon while the blender’s running. I did it once. Never again.


Price Check: Worth Making at Home?

My last bowl at home cost about 3 to 4 bucks. Here’s how I figured it:

  • Açaí packets: roughly $2.50 for two
  • Frozen fruit: about $0.75
  • Milk and toppings: maybe $0.75

At a café near me, the same size bowl is $11–$14. I still buy one when I’m out with friends. But for weekdays? Home wins. Curious how the nutrition stacks up? Healthline’s calorie and nutrition breakdown gives a clear picture of what you’re spooning up.

By the way, dialing in my bowls reminded me how fun it is to customize life’s simple pleasures. If you ever feel like personalizing something spicier than breakfast—think flirty chats that go exactly where you want—take a peek at this discreet sexting hub where you can connect with open-minded partners and explore playful, no-judgment conversations on your own terms.
Craving an in-person spark on your next desert escape? Before you lace up for Narrows or Scout Lookout, swing by Zion hookups where locals and fellow travelers set up easygoing meet-ups, making it simple to pair those jaw-dropping vistas with equally memorable company.


Make-Ahead Tricks

  • I freeze extra base in silicone muffin cups. Pop two or three “pucks” into the blender next time with a splash of milk.
  • Or I blend at night, pour into a container, and freeze. In the morning, I let it sit 10 minutes, stir, then add toppings.
  • To keep flavors straight, I slap on quick labels I designed in minutes with Covermaker.

DIY projects kind of snowball—once you master bowls, you start messing with other pantry experiments; I even tried extracting my own scents and broke down what actually worked in this essential-oil adventure.

Kid tip: My son hates spinach, but he eats the green bowl. He says it tastes like “purple ice cream.” I don’t correct him.


Little Things I Don’t Love

  • The blender is loud. Early mornings can be rough.
  • Açaí stains. I wear an apron now.
  • Seeds get stuck in my teeth. I keep floss picks around.
  • It’s easy to go sugar heavy with honey and lots of granola. I watch my scoop.

While we’re on the topic of low-lift, high-reward home hacks, my hair has been loving a simple rosemary water rinse—this recipe and test run lays out exactly what to do if you’re curious.

Still, I’d do it again tomorrow. And I will.


My Take

Making an açaí bowl at home took me a few tries, a few laughs, and one purple shirt. Now I can get that café texture most days. Thick. Cold. Bright. I feel good about what’s in it, and I save money.

Would I recommend trying it? Yes. Start small, use less liquid than you think, and don’t stress if it blends slow. The spoon-stands-up test is worth it. And if you mess up and make soup? Add a straw and call it breakfast.

I Tried a Sourdough Bread Maker So You Don’t Stress Over Sticky Dough

Note: This is a fictional first-person review written for a creative scenario.

Quick take

I used the Zojirushi Virtuoso Plus bread maker’s sourdough modes for a month. For reference, here’s the exact model I tested. It made my mornings easier and my kitchen smell like a bakery. But the tang was mild unless I tweaked a few things. It’s big, it’s loud, and it needs you to learn its rhythm. Still, I kept using it. Why? It gave me warm bread with less mess and less guesswork. Curious how another baker handled similar sticky-dough stress? Here’s a detailed rundown that echoes many of my first impressions.

My kitchen set-up (and a tiny confession)

I keep my starter, named Bubbles (of course), in a glass jar in the fridge. I bake in a small apartment kitchen with a nosy cat and a kid who loves pressing the “mix-in” button. The machine sits where the slow cooker used to live. It’s about as big as a small microwave. It looks nice—stainless steel—but it hogs space. That’s fine. I like bread more than counter room.

First bake: simple country loaf

Here’s what I did the first night:

  • Fed Bubbles in the morning. Thick, like pancake batter.
  • Used the “Sourdough Starter” course to refresh a cup of starter for 2 hours.
  • Loaded the pan: 2 1/2 cups bread flour, 1/2 cup whole wheat, 1 cup starter, 1 cup cool water, 2 teaspoons salt. No yeast—just the starter.
  • Picked the “Homemade” program I made: long rise, shorter knead, dark crust.

The loaf rose high, then dipped a little in the middle. Still tasted good. Soft crumb, light tang, chewy crust. Butter melted right in. My kid called it “moon bread” because of the little dip. Honestly, I laughed and ate another slice.

Where it shines

  • Timing help: I set it at night. It kneads, rests, rises, and bakes while I sleep. No sticky hands at 6 a.m.
  • Mix-in beeps: At the beep, I tossed in chopped rosemary and a handful of olives. The machine folded them in without smearing everything green.
  • Crust control: “Dark” crust made the top deeper and the sides a bit crisp. Not brick-hard, just sturdy.
  • Consistency: My hand-mixed loaves swing from “wow” to “why.” This kept things steady.

Where it bugs me

  • The tang: Sourdough lovers want that deep, cozy tang. The machine’s warm proof can mute it. My first loaves tasted gentle, almost too shy.
  • The top: On very active starter days, the top sagged a bit. Not flat, but not bakery-round either.
  • Paddle holes: You’ll get two holes on the bottom where the paddles sit. Small, but there.
  • Noise and thumps: During knead, it goes thump-thump. Not crazy loud, but you’ll hear it in a quiet home.
  • Space: It’s hefty. If your counter is tiny, plan a spot.

While troubleshooting the saggy tops, I dropped into a lively online forum where home bakers trade photos, starter tips, and late-night “why is my dough soup?” panic posts—the discussion on TNA Board was surprisingly helpful, with veteran members sharing timer hacks and flour blends that rescued my next loaf.

Need a quick fix for that countertop eyesore? A stylish appliance cover from CoverMaker lets the bread maker blend in when it’s off duty.

Real bakes from my week

  • Tuesday Sandwich Loaf: Swapped in 20% whole wheat, added a spoon of honey. Light crumb, slices held up to turkey and tomato. Kids devoured the ends. Tang was mild. Toasted well.
  • Saturday Rosemary-Olive: Used cool water and let the machine run a longer first rise. Salted olives, patted dry. The smell? Like a pizza shop at noon. Great with tomato soup. The crust had a nice chew.
  • Sunday Cinnamon Raisin: Mixed cinnamon into the flour. Added plump raisins at the beep. Sweet and cozy. Not a sour loaf, but the starter gave it a little spring. Butter, coffee, and peace. It paired perfectly with my morning at-home açaí bowl experiment—purple smoothie, fresh bread, total weekend win.

How I got more sour flavor

Here’s the thing: I wanted that deeper tang. I tried a few easy tweaks.

  • Cooler water: I used cold water right from the fridge. Slowed things a touch, boosted flavor.
  • Short chill: After the first rise, I paused the program and put the pan in the fridge for 2 hours. Then I resumed. Flavor got bolder.
  • Thicker starter: I fed Bubbles a bit more flour than water one day. The dough rose slower and tasted richer.
  • Salt check: 2 teaspoons was my sweet spot. Less salt made the dough bubble too fast and lose shape.

A tiny tangent about weather

On hot days, the dough felt jumpy. Fast and a bit wild. I stuck a cheap thermometer by the machine and saw it sat near 85°F during rise. That’s fine for rise, not always for flavor. Cooler water saved me there.

While your machine hums through its 2-hour proof cycle you might find yourself with unexpected free time. If you’re on Florida’s Gulf Coast and waiting for your loaf to rise, the nightlife insights in this St. Petersburg hookups guide can steer you to the city’s best meet-up spots and conversation starters—so you come back to freshly baked bread with a fresh story to tell.

Cleaning and care

The pan wipes clean with a soft sponge. The paddles sometimes stick. I twist, not yank. Flour dust gets in the corners, so I keep a little pastry brush nearby. Five minutes, done. If you’d like your kitchen to smell fresh after a bake—without synthetic sprays—I’ve been experimenting with DIY essential oils that neatly cut the lingering yeast aroma.

Who will love this

  • New sourdough folks who want fewer steps and fewer sticky bowls.
  • Busy parents who want warm bread before school.
  • People who like steady results more than “artisan drama.”

Who might pass

  • Purists chasing long, cold ferments and blistered crusts.
  • Tiny kitchens with zero spare space.
  • Light sleepers who hate the midnight thump.

Still shopping for the right countertop companion? You may appreciate this thorough roundup of the best bread machines for sourdough, which compares multiple brands side-by-side.

Small tips that helped me

  • Measure by weight if you can. If not, spoon and level the flour.
  • Use “dark” crust if you plan to slice for toast.
  • Remove the paddles before the final rise, if your program allows. Fewer holes.
  • Don’t rush to cut. Wait 45 minutes. Steam settles; crumb stays neat.

Final call

Did this sourdough bread maker change my mornings? Yep. Did it make the boldest tang right away? Not without tweaks. But warm bread, less mess, and happy kids? I’ll take it. If you want simple, steady loaves with a friendly learning curve, this machine feels like a good neighbor—maybe not flashy, but it shows up, rain or shine.

And if your first loaf dips a little? Call it moon bread and pass the butter.

How I Actually Make Green Tea (and Why My First Cup Was So Bitter)

I’m Kayla, and I drink green tea every day. It wasn’t always good. My first cup tasted like hot lawn clippings. You know what? I boiled the water and forgot the timer. Rookie move. Now I make it soft and bright, and it’s not hard at all. I wrote a deeper breakdown of that learning curve in this step-by-step post.

Here’s the thing: green tea likes gentle care. Warm water. Short time. A little calm. When I do that, it sings. For the nerds among us, this handy steeping time guide shows exactly why shaving 30 seconds off can turn bitterness into sweetness.


My not-fancy setup

  • Fellow Stagg EKG kettle (I set it to 170–175°F)
  • A small strainer and a plain mug
  • A cheap kyusu (a little Japanese teapot I got at Daiso)
  • Brita water, because my tap tastes like a pool
  • My phone for the timer

I sometimes pop a little silicone lid on top—designing one on CoverMaker was cheap and keeps the heat and aroma locked in.

You don’t need all that. A pot on the stove, a spoon, and a cup will work. I just like the temp control so I don’t guess.


The fast steps I follow most mornings

  1. Heat water to about 170–175°F. No thermometer? Heat till it just barely steams—no big bubbles.
  2. Use about 1 teaspoon of loose leaf per cup (8 oz).
  3. Pour the hot water over the leaves.
  4. Steep 60–90 seconds. Yes, it’s that quick.
  5. Strain. Sip. If it’s bitter, next time use cooler water or less time.

That’s it. Simple. Soft water, short time. If you’d like a more in-depth walkthrough (with photos, ratios, and common fixes), this concise brewing tutorial breaks everything down beautifully.


Real cups I made this week

1) Tuesday: Japanese Sencha (Harney & Sons)

  • Tea: 1 heaping teaspoon in my kyusu
  • Water: 165°F (I set the kettle to 170°F and waited 30 seconds)
  • Time: 75 seconds
  • Taste: Fresh grass, sweet pea, a little sea breeze thing
  • My note: Second steep at 30 seconds tasted round and sweeter. I like the second cup more, which still surprises me.

I tried it at 180°F last month. It turned sharp, like wet spinach. Cooler water fixed it.

2) Thursday: Dragon Well / Longjing (from a Chinatown shop in Seattle)

  • Tea: 1 teaspoon in a mug with a strainer
  • Water: 175°F
  • Time: 2 minutes
  • Taste: Toasted chestnut, silky, light yellow
  • My note: I did a third steep for 90 seconds—still tasty. Leaves looked like flat little spears. Pretty.

When I rushed and used near-boiling water once, the nutty smell vanished. It tasted dull. Lesson learned.

3) Saturday treat: Matcha (Jade Leaf)

  • Powder: 1 teaspoon (about 2 grams) into a warm bowl
  • Water: 2 ounces at 160–170°F
  • Whisk: Fast zigzags with a bamboo whisk for 20–30 seconds till it foams
  • Taste: Sweet, creamy, a tiny bit savory
  • My note: I sift the powder first so it doesn’t clump. If I add milk and ice, it turns into that café drink you see all over TikTok. Fun, but I still like it straight.

If it tastes swampy, your water was too hot or the powder got old. Bright green is your friend.

4) Sunday prep: Cold brew for work

  • Jar: 20 oz mason jar
  • Tea: 1 tablespoon loose leaf (I used Ito En whole leaf)
  • Water: Cold, filtered
  • Time: Fridge for 6–8 hours (I do it overnight)
  • Taste: Sweet, smooth, never bitter
  • My note: I toss in two lemon peels sometimes. Summer in a cup.

No kettle needed. No fuss. Just time. That citrus kick reminds me of the afternoons I spent experimenting with my own essential oils—some methods definitely work better than others.


Little mistakes I made (and how I fixed them)

  • Boiling water: Made the tea bitter and flat. Fix: 160–175°F works for most greens.
  • Long steeps: Anything past 2 minutes got harsh. Fix: 60–90 seconds, then short second steeps.
  • Squeezing tea bags: Gave a sharp taste. Fix: Let them drip out on their own.
  • Hard water: Muddied the flavor. Fix: Filtered water. Easy win.
  • Old leaves: Faded taste. Fix: Buy smaller bags; store in a tin, cool and dark.

Tiny extras that help

  • Warm the cup with hot water first. The tea stays cozy.
  • Use more leaves, not more time, if you want it stronger.
  • Re-steep good leaves 2–3 times. The second cup can be the best.
  • Smell the dry leaves. If they smell sweet and fresh, you’re in for a good time.

Honestly, the warm-cup trick feels silly. But it works. If you’re into simple DIY boosts, I also tried brewing rosemary water for my hair—not a drink, but a surprisingly handy infusion.

If you’re the kind of person who learns best by watching, jump into the live kitchen streams over at Voyeur where home brewers broadcast their tea rituals and you can pick up tiny technique tweaks in real time. Want actual company for that second steep? Residents around Ohio might appreciate checking out Canton hookups where you can quickly meet new people who are also up for low-key hangs—maybe even over a calming cup of green tea.


When I’m tired or late

I grab an Ito En teabag at my desk. Water from the office kettle, and I count to 60. It’s not fancy, but it beats sad coffee. If I’m out, I’ll buy a bottle of Oi Ocha unsweetened green tea. Cold, clean, no sugar. Lifesaver on hot days.


Quick guide by type (what I actually do)

  • Sencha: 165–170°F, 60–90 sec, 1 tsp per cup
  • Dragon Well: 170–175°F, 2 min, 1 tsp per cup
  • Gunpowder: 175°F, 90 sec, 1 tsp per cup (rinse 5 seconds if it’s smoky)
  • Matcha: 1 tsp powder, 2–3 oz water at 160–170°F, whisk fast

These aren’t rules. They’re guardrails. Tweak and taste.


My take

Green tea isn’t fussy. It just wants kindness—cooler water, short time, a bit of patience. When I slow down, I get a soft, sweet cup that makes my morning feel steady. You know what? That first sip still feels like a small win.

If your tea turns bitter, don’t toss it all. Lower the heat. Cut the time. Try again. Gentle wins here—and you’ll taste it.

I Tried a Heart Locket GIF Maker. It’s Sweet, Silly, and Kinda Perfect.

I’m Kayla. I make a lot of little keepsakes. Photo stuff. Video bits. You get it. Last month, my group chat blew up over that heart locket trend. So I tested a heart locket GIF maker for real life moments. I used my iPhone for quick edits and my old Windows laptop to finish the GIFs. It wasn’t hard. It was a little fussy, though.

Here’s what happened when I actually made a few.
If you’d rather skip my cliff-notes and read the full step-by-step, you can check out my longer deep-dive over on CoverMaker.

Why I Wanted This Thing

Two reasons. My mom loves “old-timey” stuff—lockets, pearls, all of it. And my friends keep sending GIFs that loop forever. So I wanted a small, shiny thing that felt like both. Cute, but not too cheesy. Did I pull that off? Some days yes, some days… close.

What I Used (Real Tools, I Promise)

  • CapCut on iPhone: I used the Heart Locket template. It has that open-and-close locket animation already built in.
  • EZGIF on the web: I used this to turn the export into an actual GIF and shrink the file size (here's a handy guide on optimizing GIFs).
  • Canva (free): I tried their “heart locket” elements and added a simple swing animation. It worked, but I ran into watermarks on some fancy bits.

The learning curve felt a lot like when I tried a sourdough bread maker—once the tool handles the sticky parts, the rest is just timing.

I also tested sending with GIPHY, but I didn’t need it for making. Just for sharing.
If you'd rather skip the multi-app shuffle, the one-click locket template on CoverMaker pumps out a polished GIF in seconds.

Example 1: Grandma’s Birthday Text

I started in CapCut. I picked the “Heart Locket” template (the gold one with a soft glow—looks a little like brushed metal). I dropped in two photos: one close-up of my grandma smiling, and another of us holding hands at the diner. I trimmed the timing so the locket opens right on her smile.

Exported as a short MP4 at 1080p. Then I went to EZGIF. I set:

  • Width: 540 px (small but still clear)
  • Frames per second: 12
  • Colors: 64 with “Floyd-Steinberg” dithering (smooths the gradients)
  • Loop: forever

File ended up a little under 3 MB. I sent it in the family chat. My mom texted, “Oh my heart.” That was the win I wanted. Did it look a tiny bit corny? Sure. But it felt warm. And the gold shimmer made her eyes pop.

Example 2: A Valentine That Didn’t Look Like Candy Wrappers

I tried Canva for this one. I searched “heart locket,” dropped in a silver locket graphic, and used a simple “pan” animation so it swung a bit. I layered our photo inside. Looked good in the editor. But the nice glitter overlay had a crown icon. That meant a watermark on free accounts. I’m cheap that day. So, no.

I went back to CapCut, used their heart locket template again, and switched the color tone to cooler silver. I exported vertical (1080×1920) for Instagram Stories. On EZGIF, I set width to 720 px and kept 12 fps. Then, to keep the file light, I cut colors down to 48. That did cause slight banding in the background glow—tiny dots. But my partner didn’t notice. He just laughed and said, “We look fancy.”
If you’re tempted to slip an extra-flirty version of this locket into a late-night Snap, you might first want to read the full SnapSex app review so you know exactly how the platform handles privacy, costs, and real-world matches before sending anything steamy. And if you’re hanging out anywhere near the South Bay and thinking about turning that playful GIF exchange into an actual meet-up, the local rundown at Carson hookups shows you where to find like-minded singles fast and lays out tips for keeping things casual and drama-free.

Example 3: Office Slack Birthday Shoutout

For a coworker, I made a locket GIF with our team photo. I added our tiny logo inside the locket. It looked neat, but at 15 fps, the motion felt jittery in Slack. Dropped it to 10 fps. Better. The file went down to about 2.2 MB. One catch: the locket edge cropped weird in dark mode previews. I fixed it by adding a thin white outline around the whole frame in EZGIF (add border, 2 px, white). Tiny thing. Big help.

What I Liked

  • It’s fast. The template does the heavy lifting. No need to keyframe the open-and-close.
  • The mood is sweet. The glow, the soft blur, the gentle open—very gift-like.
  • The settings actually matter. 12 fps and 540–720 px width gave me clean, small files.

What Bugged Me

  • Watermarks on some Canva elements. I’m fine with free, but those crowns show up at the worst time.
  • Color banding in GIFs with glows. EZGIF helps, but bright gradients still get speckled.
  • File size can spike. Full HD GIFs get heavy fast. You’ll need to tweak frames and colors.
  • Crop trouble. If your photo sits near the edge, the locket rim covers hair or hats. Center faces.

Small Tips That Saved Me

  • Keep the face centered. The hinge eats space.
  • Use 12 fps for smooth, small loops. Go lower if Slack or Discord stutters.
  • Width 540 or 720 px is a sweet spot.
  • Stick to 48–64 colors with dithering for soft glows.
  • Export MP4 first, then convert to GIF. It’s cleaner.
  • If the background flickers, add a subtle texture layer before export. It hides banding.

Dialing in file size and color palettes actually reminded me of my experiment with homemade essential oils—tiny tweaks change the whole vibe.

Who It’s For

  • Parents and grandparents who love keepsakes.
  • Teens who want that cute loop for Stories.
  • Anyone who needs a quick birthday shoutout at work.
  • Not great for print. It’s a screen treat.

A Tiny Digression About Feel

I thought a heart locket would feel too kitschy. And sometimes it is. But when my grandma saw her smile open inside the locket, she touched her necklace. She said, “Your grandpa would’ve loved this.” That’s the part that got me. Cheesy? Maybe. Worth it? Oh yes.

Final Take

I’d give the heart locket GIF maker setup—CapCut template plus EZGIF—a 4.4 out of 5. It’s simple, cute, and fast. You may fight with file size and a bit of banding. Still, the end result feels tender.

If the folks who make these tools ever read this, I want two things: a built-in GIF export with light dithering, and more locket styles (rose gold, matte black, maybe a wood inlay for a rustic look). Until then, this mix works. It made my people smile. That’s the whole point, right?

I made yogurt in my Instant Pot. Here’s what actually happened.

I’m Kayla, and yes, I’ve made yogurt at home. Many times. Some perfect. Some a little… wobbly. The Instant Pot makes it easier, but it’s not magic. I learned what works in my kitchen, with my kids running around and a cat that thinks the steam is a toy. You know what? It’s worth it. If you’d like the blow-by-blow of my very first go, I made yogurt in my Instant Pot—here’s what actually happened and wrote it all down. For a pro-tested roadmap, Epicurious offers a detailed step-by-step Instant Pot yogurt guide that lines up nicely with what I found.

My setup (real gear, real mess)

  • Instant Pot Duo Plus 6-quart
  • Thermometer (ThermoWorks ThermoPop)
  • Whisk and ladle
  • Euro Cuisine strainer for Greek yogurt
  • Wide-mouth mason jars for school snacks
  • Milk: Costco whole milk and Fairlife 2% ultra-filtered
  • Starter: 2 tablespoons of Fage 2% plain yogurt (fresh tub, no flavors)

I keep a second silicone ring just for yogurt. The regular ring smells like chili night. That smell will sneak into your yogurt. Ask me how I know.

Batch 1: The “cold start” win

I tried the easy way first. No boiling. I used Fairlife 2% because it’s ultra-filtered.

  • I poured a half gallon into the stainless steel pot.
  • Whisked in 2 tablespoons of Fage.
  • Hit Yogurt > Normal > 8 hours.
  • Covered with a glass lid.

Eight hours later, I had thick yogurt. Not Jell-O thick, but good. Spoon stood up for a few seconds. The taste was mild. My son ate it with honey and called it “breakfast pudding.” I strained half of it for 90 minutes, and boom—Greek style. Super creamy. No chalky bite.

What I liked: no thermometer, no hot milk, less cleanup. What I didn’t: a slight “processed milk” note from Fairlife. Not bad, just there.

Batch 2: The cook-and-cool method

Then I went classic with Costco whole milk.

  • Heated on Yogurt > Boil (mine reaches 180–185°F).
  • Held it there for about 5 minutes.
  • Cooled to 112°F. I used a cold water bath in the sink to speed it up.
  • Whisked in 2 tablespoons of Fage.
  • Yogurt > Normal > 10 hours overnight.

This batch was thicker than the first and more tangy. The top had a thin skin. I just whisked it smooth. After straining for 2 hours, I got the kind of Greek yogurt that stands up in a parfait glass like it owns the place. Great with strawberries. My husband added a spoon of jam and said it tasted like diner yogurt from back home in Jersey.

So, which way do I use now?

Weeknight short path: Fairlife cold start, 8–9 hours. Done.

Weekend gold standard: Boil regular whole milk, cool, 10 hours, then strain. Best texture. Best flavor.

If I’m packing lunches, I do “pot-in-pot.” I put eight 4-ounce jars on a trivet with 1 cup of water in the bottom. Same times. No scooping mess. The lids go on after they set and cool. To keep flavors straight, I whip up quick waterproof labels using CoverMaker, and they stick even after a run through the dishwasher.

Need a bigger reference point? Food Network has a helpful rundown of everything you need to know about making yogurt in an Instant Pot, including clever hacks for different milk types and flavor add-ins.

Step-by-step I’d hand to a friend

  • Clean the pot, whisk, and ring. Hot soapy water. Rinse well.
  • Pick your milk path:
    • Cold start: Fairlife or another ultra-filtered milk.
    • Boil method: Any dairy milk. Heat to 180°F, then cool to 110–115°F.
  • Starter: 2 tablespoons plain yogurt with live cultures. Fresh tub. No flavors.
  • Whisk starter into the milk until smooth.
  • Press Yogurt > Normal > 8–10 hours.
  • Don’t stir while it sets. Just let it be.
  • Check: Should jiggle as one piece. A little whey on top is fine.
  • Chill at least 4 hours before judging thickness.
  • Want Greek style? Strain 1–3 hours, fridge cold, until you like the body.

What went wrong (and how I fixed it)

  • Runny yogurt: I rushed the cooling step and added starter while the milk was too hot. The cultures sulked. Now I check for 110–115°F. Also, I incubate longer. Nine to ten hours gives a stronger set.
  • Sour city: I left one batch for 14 hours. Way too tangy for my taste. Good for tzatziki though.
  • Weird smell: The ring kept chili smell. I bought a white “sweet” ring just for yogurt and baking.
  • Grainy layer: Let the milk rest after heating, then whisk. Whisk again after it’s done. Straining also smooths it out.
  • Slipped timing: The power flickered and the Yogurt cycle turned off at 3 hours. It looked half-set. I restarted for 8 more hours. The texture was fine, just a little softer.

Taste tests at my house

  • Plain: Mild with Fairlife, brighter and richer with boiled whole milk.
  • With honey and pistachios: Company-ready good.
  • Peach season: Sliced peaches, tiny bit of brown sugar, and a pinch of cinnamon. Summer in a bowl.
  • School jars: 4-ounce portions with thawed frozen blueberries. They come home empty.

For a fruit-forward breakfast alternative, I finally nailed my at-home açaí bowl after a few purple messes—so good alongside a scoop of homemade yogurt.

My 7-year-old likes it lightly sweet. Speaking of keeping things sweet (in a totally different way), anyone curious about the ins-and-outs of modern “sugar” relationships can browse this in-depth look at Sugardaddy.com for honest details on membership costs, safety tips, and what kind of matchmaking experience to expect.
If you’re closer to Massachusetts and prefer something a bit more spontaneous than a long-term sugar arrangement, the nightlife guide at Andover hookups can point you toward the best local spots and practical safety pointers so you can enjoy no-strings fun without the guesswork.

Pros and cons from my kitchen

Pros:

  • Saves money. A gallon becomes a week of snacks.
  • You control sugar, thickness, and tang.
  • The Instant Pot keeps the temp steady. No fussing with ovens or towels.

Cons:

A small nerdy bit (kept simple)

Yogurt sets when friendly bacteria eat milk sugar and make acid. The milk then thickens. Warmer temp makes them happy, but too hot hurts them. That’s why I care about 110–115°F for the starter and steady heat during the cycle. That’s also why I don’t stir while it sets.

My go-to recipe card

  • Milk: 1/2 gallon whole milk
  • Starter: 2 tablespoons Fage 2% plain
  • Heat to 180–185°F, cool to 110–115°F
  • Incubate on Yogurt > Normal > 10 hours
  • Chill 4 hours, then strain 1–2 hours for Greek

If I’m tired: Fairlife 2% + 2 tablespoons starter + 8–9 hours. No boiling. Good every time.

Final take

Can you make great yogurt in an Instant Pot? Yep. I’ve done it on busy weekdays and slow Sundays. The cold start is easy. The boil method tastes best. It’s cheaper than store cups, and the texture can be dreamy if you give it time and chill it well.

Would I change anything? I’d have bought that second ring sooner. And I keep a small tub of fresh starter in the back of the fridge like a secret key. Once you get your rhythm, it’s almost boring. Almost. But then you add warm honey and toasted nuts, and wow—boring doesn’t stand a chance.

I Made Whipped Honey at Home: What Worked, What Didn’t

I grew up calling it “spun honey.” My grandma sold small jars at the county fair. Warm biscuits. Sticky fingers. Pure joy. So yeah, I had to try it myself. For the blow-by-blow of the experiments (extra photos, too), you can peek at my detailed whipped-honey breakdown.

Here’s the thing: whipped honey isn’t really “whipped.” It’s honey with tiny crystals. You guide it. You don’t force it. Sounds fancy, but it’s simple once you get the rhythm. If you’d like a science-backed walkthrough of what’s happening inside the jar, Beechworth Honey’s Guide on Creamed Honey explains the crystallization process in everyday language.

Spoiler: my first batch set like frosting. My second batch tasted like churros. My third batch got a little gritty—my fault, and I’ll tell you why.


What I Used (Real Stuff From My Kitchen)

  • Honey: Kirkland clover (2 lb), Local wildflower, and a bottle of orange blossom
  • Seed honey: a jar of smooth creamed honey from my farmer’s market
  • Mixer: KitchenAid Artisan with the paddle
  • Tools: digital thermometer, rubber spatula, 12 oz glass jars with lids
  • Bonus: a cool spot in my basement (about 55–60°F), which helps a lot

You can use a hand whisk. It just takes longer. I tried both. For big batches, the mixer wins.


The Simple Ratio That Saved Me

I use 1 part seed honey to 8–10 parts liquid honey.
So if I have 40 oz of liquid honey, I add 4–5 oz of seed.

Turns out this isn’t just a home-kitchen hack; the same approximate ratio appears in the University of Minnesota’s Creamed Honey Recipe by Warren Schave, which gave me confidence that my grandma’s rule of thumb had some academic backing.

Seed honey is the “starter.” It’s smooth and has fine crystals. It teaches the new honey to set the same way.

No seed? Buy a small jar of creamed honey. Or grind a spoon of clean, firm, crystallized honey till it’s super fine. I did that once with a mortar and pestle. It worked, but it was messy.


Step-By-Step: How I Actually Do It

  1. Warm the honey a bit
    I set the honey jar in a warm water bath. I keep it under 100°F. I check with my thermometer. If it gets too hot, the flavor dulls. Ask me how I know.

  2. Mix in the seed
    I add 10% seed to the warm, pourable honey. I use the paddle on speed 2 for about 3–4 minutes. I scrape the bowl. I try not to whip in air. This part is calm. No rush.

  3. Rest, jar, and let it set
    I let the bubbles rise for 20 minutes. Then I jar it. Before they go downstairs, I slap on tidy labels I designed in minutes with CoverMaker, because a good-looking jar makes the waiting easier.
    I put the jars in my cool basement for 5–10 days. If you don’t have a cool spot, a wine fridge works. The regular fridge is a bit too cold. It can make bigger crystals. I’ve done it in a pinch for 24 hours, then moved to the pantry. It still set, but the texture wasn’t as fine.


Real Batches I Made (And What Happened)

  • Batch 1: Simple Clover

    • 36 oz clover honey + 4 oz seed (about 10%)
    • 92°F warm, 4 minutes mix
    • Set at 58°F for 6 days
    • Result: smooth, creamy, like honey butter. Spread on toast like a dream. My kid ate it on apple slices and said it tasted “like clouds.” I’ll take that.
  • Batch 2: Cinnamon “Churro” Honey

    • 24 oz orange blossom + 3 oz seed
    • 1.5 tsp Saigon cinnamon per pound of honey, plus 1/4 tsp vanilla bean paste total
    • Set for 7 days
    • Result: sweet, floral, and cozy. The kitchen smelled like churros. Texture stayed fine. The vanilla was tiny, so the water content didn’t mess it up.
  • Batch 3: Hot Honey Spread

    • 16 oz local wildflower + 2 oz seed
    • 1/2 tsp ancho chili powder, pinch of salt
    • I tried to rush it in the fridge. Bad move.
    • Result: flavor was great on fried chicken. But the crystals got a bit coarse. It still spread, but it wasn’t velvety. Lesson learned: cool, not cold.

Things I Messed Up (So You Don’t)

  • I overheated the honey once (hit 120°F). It tasted flat after. It also took longer to set.
  • I used grainy seed once. Grit in, grit out. Now I only use very smooth seed.
  • I used a blender and got foam. It looked pretty… for 10 minutes. Then I had to re-warm and redo. Stick with a paddle or a whisk.
  • I added liquid lemon juice. It thinned the honey and messed with the water level. If you want lemon, use zest or powdered peel.

Flavor Ideas That Actually Work

  • Cinnamon + vanilla (tiny vanilla)
  • Cocoa powder + a pinch of espresso powder
  • Freeze-dried strawberry powder (bright and fun; kids love it)
  • Pumpkin spice in fall
  • Chili flakes or ancho powder for savory dishes
  • Salted honey: just a pinch of fine sea salt makes it pop

Powders are your friend. Liquids? Be careful. Honey doesn’t like extra water. And if you’re curious about pulling pure flavor without adding moisture, here’s what happened when I tried making my own essential oils.


Storage Notes Nobody Told Me

  • Keep it sealed. Honey pulls in moisture if you leave it open.
  • Use a clean, dry spoon. Water in the jar can cause trouble.
  • If it gets too firm, stir it, or warm it gently.
  • Summer heat makes it softer. Winter makes it thicker. That’s normal.

I write the date on the lid with a marker. Helps me track the set time and tweaks.


Quick Summary: My Go-To Method

  • 10% seed honey
  • Warm to about 95°F
  • Paddle mix, low speed, 3–4 minutes
  • Jar it
  • Let it set at 55–60°F for a week
  • Eat with biscuits, toast, apples, pancakes, fried chicken… no rules

Tiny Nerd Corner (But Simple)

  • This is controlled crystallization. We’re steering the crystal size.
  • Fine crystals = smooth texture.
  • Temperature matters. Too cold, and crystals grow fast and big. Too hot, flavor fades.
  • That’s why 55–60°F is the sweet spot.

I know, it sounds fussy. It’s not. It’s more like letting bread rise. You set the scene. Nature does the rest.


What I Loved

  • The texture is like honey frosting.
  • It’s cheap to make and great for gifts.
  • I can tune the flavor for my house.

What Bugged Me

  • The wait. A week feels long when you’re hungry.
  • Temperature control can be tricky without a cool spot.
  • Clean-up is sticky. Warm water helps. Still sticky.

Final Take

Would I make whipped honey again? Yes. A hundred times. It’s simple, kind of cozy, and the payoff is big. You know what? Start with one small jar tonight. Use clover honey and smooth seed. By next week, you’ll have a spread that makes plain toast feel fancy. If you’re into low-effort, high-payoff kitchen experiments, you might also enjoy the rosemary water I brewed for healthier hair—it’s as satisfying as whipping honey, just on a different shelf of the pantry.

Feeling inspired to share (or even sell) your homemade whipped-honey jars with neighbors? Visit Fucklocal’s free signup page to create a local seller profile, connect with nearby food lovers, and start taking orders without the hassle of setting up your own website.

If you happen to be in the Aurora area and want to make your evenings as sweet as your toast—by meeting new people rather than new recipes—peek at Aurora hookups where you can browse verified local profiles and set up low-pressure, no-strings-attached meet-ups in minutes.

And if you mess up a little? Stir, adjust, and try again. Honey is patient. So are biscuits.

I Tried to Make My Boobs Look Smaller: What Actually Worked for Me

I’ll be real. I wanted my boobs to look smaller. Not gone—just…quieter. I’m a 34G most days. On my period, I go up a cup. Shirts pulled weird. My back got sore by noon. Running? Bounce city.

So I spent a year testing stuff. Bras, clothes, food changes, workouts. A doctor chat too. Some things helped a lot. Some things were a big nope. Here’s my honest take, with real things I used and what they did for me. I also got inspired by another detailed breakdown of breast-minimizing tricks which gave me a few early ideas to test.


Quick truth check

  • You can’t pick one body part and make only that shrink. I tried. No luck.
  • You can make them look smaller. A lot smaller, some days.
  • Comfort matters. If it hurts to breathe, it’s not worth it.

You know what? Small changes stacked up for me. Little wins.


Things that did change my size a bit

  • Gentle weight loss: I lost 12 pounds over 5 months. Slow and boring, but my boobs dropped about one cup. My under-bust stayed the same. My shirts fit flatter. I ate more protein, fewer sugary snacks, and walked after dinner. Nothing fancy.

  • Salt and period swell: Right before my period, I used to puff up. My boobs got tender and bigger. Cutting salty takeout for two days helped the bloat. I also wore a softer bra that week.

  • Posture: When my shoulders rolled in, my chest looked rounder. When I pulled my ribs up, chin level, it looked smaller. It’s tiny, but it shows in photos.


Bras that actually made them look smaller (mini reviews)

I paid for all of these. I wore each for at least a month. If you want an expert-curated short list before spending money, I found Harper’s Bazaar’s best minimizer bras for large breasts article super handy for cross-checking features like band stretch and cup depth.

  • Wacoal Visual Effects Minimizer (34G)

    • Look: Down about 1 inch under my T-shirts. Smooth, no lines.
    • Feel: Light, no squish. Good for work days.
    • Gripe: Band ran tight at first. It relaxed after 3 washes.
  • Bali Passion for Comfort Minimizer (34DDD sister size)

    • Look: Almost as flat as Wacoal, a bit more round.
    • Feel: Soft straps. Good price.
    • Gripe: Cup edge showed under thin tops.
  • Enell High Impact Sports Bra (size 2)

    • Look: Very flat. Jacket closed easier over it.
    • Feel: Zero bounce on runs. Great for spin class.
    • Gripe: Front hooks take practice. Not cute, but works.
  • SheFit Ultimate Sports Bra (size M Luxe)

    • Look: Compressed, but not pancake-flat like Enell.
    • Feel: Adjustable straps are a win. I liked it for strength days.
    • Gripe: Velcro can rub if you don’t line it up right.
  • Natori minimizer (Pure Luxe) (34G)

    • Look: Natural shape, a hair smaller than Wacoal on me.
    • Feel: Very comfy fabric.
    • Gripe: Pricey. But it held up after lots of washes.

Tip from a fitter at Nordstrom: Try sister sizes. I ended up in a 34G or 36F in some brands. Wild, but it worked.


Binding: I tried it once, with care

I tested an Underworks binder under a bridesmaid dress. It made me look two sizes smaller. It also made deep breathing hard after a few hours.

What I learned:

  • Don’t layer two tight bras. I got a rib ache and a rash once. Not smart.
  • If you try a binder, keep it to short windows. No sleeping in it. Check your skin.
  • If you feel numb or light-headed, take it off. No event is worth that.

I almost wrote “never again.” But for that one dress, for four hours, it did the job. Then I went back to my minimizer bras.


Clothes that trick the eye (and feel good)

These little swaps helped me the same day.

  • V-necks that aren’t too low. They break up the front and look softer.
  • Matte fabrics. Shiny tops make everything look bigger. Ask me how I know.
  • Small prints, not giant flowers.
  • Structured layers: a blazer with a bit of shape. My H&M black blazer (size M) is my secret weapon.
  • Skip bulky chest pockets.
  • Long necklaces? They can point straight to your chest. I learned the hard way. I swap to a short pendant.

For a deeper dive into dressing techniques, Zizzi Fashion’s practical guide on how to make your breasts appear smaller breaks down neckline geometry, fabric weight, and pattern scale in a way that pairs perfectly with the tips above.

Bonus hack: I played with a free outfit mock-up tool at Covermaker to preview how certain necklines would drape on a body similar to mine before clicking “buy.”

Random, but hair matters too. When I wore my hair up high, my chest looked more “front and center.” A low bun balanced things out. The day I made rosemary water for my hair I noticed the extra volume framed my shoulders in a way that actually balanced my chest.


Workouts that helped the look (not magic, but real)

No, chest presses did not melt my boobs. But a stronger back and chest pulled my shoulders wide and lifted everything. It looked smaller from the side.

My simple plan, three days a week:

  • Dumbbell bench press: 3 sets of 10
  • Seated row or band row: 3 sets of 12
  • Dead bug or bird dog: 3 sets of 8 per side
  • Plank: 3 rounds of 20–30 seconds

I kept it easy. I wore Enell on run days, SheFit on lift days. Less bounce, less soreness. Win-win.


What didn’t work for me

  • “Shrink tea” and weird gummies. My body said no, and my wallet cried—plus the time I tried making my own essential oils was messy and equally pointless.
  • Wearing two tight sports bras all day. I got red marks and a headache. Not worth it.
  • Only chest workouts. My size didn’t change. My posture did. That part helped.

I also tried cutting coffee. It didn’t change my size. It just made me grumpy. So I brought coffee back. Balance, right?


Doctor chat and surgery thoughts

I did a consult with a board-certified plastic surgeon. We talked about reduction surgery. He measured me, showed scar patterns, and explained risks like loss of nipple feeling, trouble nursing, and healing time. He also checked my back pain notes and bra grooves. Insurance rules were a maze.

I chose not to do it—for now. A close friend did, and she’s happy. If you consider it, see a real surgeon, ask a ton of questions, and plan time off. It’s a big choice. I’m not your doctor, so please talk to yours.


On a totally different self-esteem note, seeing how fuller figures are celebrated in more sensual settings gave me a confidence boost. While browsing body-positive communities I came across a wide-ranging directory of independent companions at fucklocal.com/escorts/ where women of every shape and cup size proudly showcase their curves; scrolling through reminded me that there’s a thriving audience that genuinely appreciates bigger chests, and that perspective can be empowering if you’re feeling down about your proportions. And speaking of spaces that celebrate all shapes, if you ever find yourself in Puerto Rico and want to explore a low-pressure dating scene where confidence beats cup size, check out this guide to arranging relaxed San Juan hookups—it breaks down the safest bars, local etiquette, and vetted apps so you can focus on fun instead of fretting over your figure.


My “make them look smaller today” checklist

  • Minimizer bra that fits snug but comfy
  • Matte, simple top (no chest pockets)
  • V-neck or open collar
  • Light posture check: ribs up, shoulders soft
  • Simple necklace, not long
  • If running: Enell or SheFit and call it a day

Final thought (and a tiny pep talk)

I still have big boobs. Some days I want them smaller. Some days I like the curve. Both can be true.

What helped most was fit. The right bra, the right top, and a bit of strength work. None of it was flashy. It just made daily life easier. And that, for me, was the goal.

If you try any of these, start gentle. Test one change at a time. Be kind to your body while you learn what helps. And if

My Hands-On Review: Luvele Yogurt Maker

I love yogurt. But store yogurt made my gut grumpy. Too sweet. Too thin. So I bought the Luvele yogurt maker with my own money. After skimming through pages of glowing feedback on Trustpilot, I felt confident hitting the checkout button. And I’ve used it a lot at home. In my tiny kitchen. With kids asking, “Is it ready yet?”

Here’s the thing: I didn’t expect to care this much about temperature and time. Now I do. Weird, right?

What it’s like to use

The Luvele uses a warm water bath. You set the temp and timer on a little screen. Mine lets me pick 36, 38, or 40°C. The timer on my unit goes up to 24 hours. If I need longer, I just start another cycle. Not fancy, but it works.

It came with glass jars and BPA-free lids. The jars feel solid. I like that I can ferment in small jars and grab one for work. Less spoon drama in the morning.

Filling the water bath is easy. I use my kettle and cold tap water to hit warm, not hot. Then I place the jars in and close the lid. It’s quiet. Like, whisper quiet. The panel light is bright at night, so I tuck it in a corner.

First batch: simple “Greek-style” win

I started with whole milk and a basic starter. I used Fairlife 2% once too. That one didn’t need scalding first. If you've ever wondered whether the Instant Pot yogurt function is easier, spoiler: it has its own quirks — here’s what actually happened when I tried it. When I use regular milk, I heat it on the stove, then cool it. Old-school, but it gives a thick set.

I set the Luvele to 40°C for 8 hours. The yogurt came out soft and clean-tasting. My daughter stirred in honey and raspberries. I strained a couple jars overnight in a mesh bag. Boom—thick Greek-style. Lunches for two days, done.

Taste? Mild tang. Not sour. The kitchen smelled warm and milky. Cozy, like baking day, but easier.

Real talk: my coconut yogurt saga

Batch one was a mess. Full-fat canned coconut milk, starter, no thickener. It split into layers. I stared at it like it had betrayed me.

Batch two: I whisked in 1 teaspoon gelatin for four cups. Set at 38°C for 12 hours. That held firm, like a soft custard. I added a spoon of maple syrup and vanilla. Now it’s my go-to dairy-free snack. Not super sweet. Just right.

The nerdy one: L. reuteri yogurt

I wanted a long ferment for my gut. So I crushed a few BioGaia tablets and mixed with inulin powder and whole milk. I set the Luvele at 36°C. The timer maxed at 24 hours, so I ran another 12. Yes, I babysat the button. Worth it. If you’ve ever suspected that mainstream nutrition rules are upside-down, Dr. Berg explains why in this eye-opening blog post about how “everything you’ve been taught is backwards” (read it here).

It came out extra tangy and a bit stretchy. Funny texture, but I like it. I eat a small jar in the evening. My stomach feels calm after. Placebo? Maybe. But I’ll take calm.

Little details that matter

  • The jars go on the top rack of my dishwasher. No chips so far.
  • Condensation gathers under the lid. I wipe it when I peek.
  • The cord is a bit short. I had to shuffle my coffee maker over.
  • The beep is soft. I missed it once. I now set a phone timer too.

Waiting for milk to cool or for a 24-hour ferment to finish leaves plenty of downtime. If you’d rather spend those hours exchanging playful messages than just watching a timer tick down, explore this in-depth list of the best platforms for discreet, fun online flirting at sexting sites. It compares top apps, outlines their safety features, and shows how to get started so you can keep things spicy while the yogurt cultures stay cozy. For readers in East Texas who’d prefer to skip straight to an in-person meet-up, check out Longview hookups—the guide highlights the most active local spots and dating apps so you can quickly connect with nearby singles and maybe bond over homemade yogurt instead of boring small talk.

What I love

  • Stable temp with the water bath. No hot spots.
  • Glass jars. Safe, sturdy, easy to store.
  • Control. I pick the temp and time for each culture.
  • Quiet. It hums along while we sleep.

What bugs me

  • The 24-hour limit. Long ferments need a restart.
  • Water bath means fill and empty every time. Not hard, just… splashy.
  • Jars are tall. One shelf in my fridge doesn’t fit them standing up.

Still, compared with wrestling stiff sourdough starter, yogurt feels like a breeze—my recent test of a bread maker taught me all about not stressing over sticky dough.

A few tips from my kitchen

  • Don’t overfill the water. It rises when you add jars.
  • Leave the jar lids loose while fermenting. Tighten after.
  • Let yogurt chill a full 6–8 hours before judging thickness.
  • Label jars with a dry-erase marker. Date, temp, culture.
  • If it’s runny, add time or use a mesh strainer. No drama.
  • Want prettier labels than my scrawled marker? In under five minutes you can design and print slick jar stickers with CoverMaker.

Who will like it

  • Parents packing lunches. It’s cheaper and better tasting.
  • Folks who want SCD/GAPS style yogurt with longer ferments.
  • Anyone picky about texture. You can make it mild or tangy, thin or thick.

Final take

I didn’t buy the Luvele to “get fancy.” I bought it to stop guessing. Now I get yogurt that fits my taste and my belly. Is it perfect? No. The timer cap is annoying, and I do spill the water sometimes. But it makes reliable, silky yogurt on my schedule.

Would I buy it again? Yep. I use it three or four times a week. My fridge is full of small jars with white lids and little scribbles. It makes me oddly happy.

And you know what? A spoon of fresh yogurt at 6 a.m., before the house wakes up—quiet, cool, and a little tangy—that’s my kind of win.